

- Home
- Products
- HOT
- Technology
- Service
- Resources
- About
- Contact
- All
- Product Name
- Product Keyword
- Product Model
- Product Summary
- Product Description
- Multi Field Search

Views: 0 Author: Site Editor Publish Time: 2026-07-13 Origin: Site


Selecting an ice hockey player helmet is the single most critical gear decision a player makes. Yet, buyers often prioritize brand loyalty or aesthetics over structural fit and safety physics. You must understand there is no "concussion-proof" helmet available today. True protection relies entirely on aligning the internal profile to your specific head shape. It also demands matching the foam technology to the impact velocity typical of your play level.
This guide breaks down the essential technical evaluation criteria you need, from foam densities to safety certifications. We will help you shortlist, fit, and integrate the correct hardware and ice hockey cage for your specific game environment. You will learn to prioritize fit, discard incompatible shapes, and evaluate materials critically before stepping onto the ice.
Understanding your actual risk environment is the first step in equipment selection. Players face vastly different physical forces depending on their league. You should never buy gear based solely on what professionals wear. Instead, match the solution category directly to your typical game scenarios.
Adult recreational leagues and beginner sessions carry a specific risk profile. You are more likely to experience incidental falls, errant sticks, and low-velocity pucks rather than heavy body checks. The primary goal here is baseline protection against accidental collisions. Helmets utilizing single-density or dual-density VN (Vinyl Nitrile) foam offer the best solution. They provide immediate comfort out of the box. They handle repeated low-impact bumps exceptionally well. Furthermore, they remain highly affordable for casual players who do not face extreme impact forces.
Stepping up to competitive travel hockey or high school leagues changes the physical demands entirely. The risk profile expands to include high-speed open-ice collisions, heavy board impacts, and high-velocity slap shots. You need advanced energy dispersion. Solutions at this level typically feature EPP (Expanded Polypropylene) foam bases. Manufacturers often combine EPP bases and secondary memory foam inserts. This hybrid approach absorbs catastrophic single impacts while keeping the player comfortable. You will also find tool-less adjustment systems here. These allow you to make vital mid-game micro-adjustments if the shell shifts during rough play.
Elite environments expose athletes to extreme velocities and frequent rotational impacts. Professional collisions generate immense linear and torsional forces. Helmets built for this tier utilize cutting-edge material science. Solutions include 3D-printed lattices, suspended liner technologies, and fluid pods. Multi-density hybrid foams work alongside these structures to manage complex rotational energy. They prevent the brain from twisting upon impact. While highly protective, these models require precise anatomical alignment to function correctly. An improperly sized elite ice hockey player helmet will fail to utilize these advanced structures effectively.
Material science defines how energy moves from the outer shell to your skull. Marketers often invent proprietary names for standard materials. You must look past the branding and evaluate the core foam architecture. Each material type has distinct advantages and operational limitations.
VN liners resemble traditional sponge foams. They feel soft against the scalp and mold naturally to your head over time.
EPP looks and feels similar to the dense foam found inside premium bicycle helmets. It forms a rigid, highly protective barrier.
Modern flagship models introduce 3D-printed geometric lattices and rotational suspension systems. While advanced structures better manage rotational forces, buyers must remain skeptical of marketing claims. Do not assume complexity equals safety. Evaluate these technologies based on proven third-party safety ratings. Frameworks like the Virginia Tech Helmet Ratings provide independent testing data. Focus on objective performance rather than brand jargon.
| Liner Material | Primary Impact Specialty | Fit Characteristic | Weight Profile |
|---|---|---|---|
| Vinyl Nitrile (VN) | Low-to-Medium (Repeated) | Malleable, soft | Heavier |
| Expanded Polypropylene (EPP) | High-Velocity (Catastrophic) | Rigid, unforgiving | Lightweight |
| 3D Lattices / Suspension | Rotational & Linear Torsional | Suspended, highly adaptive | Variable |
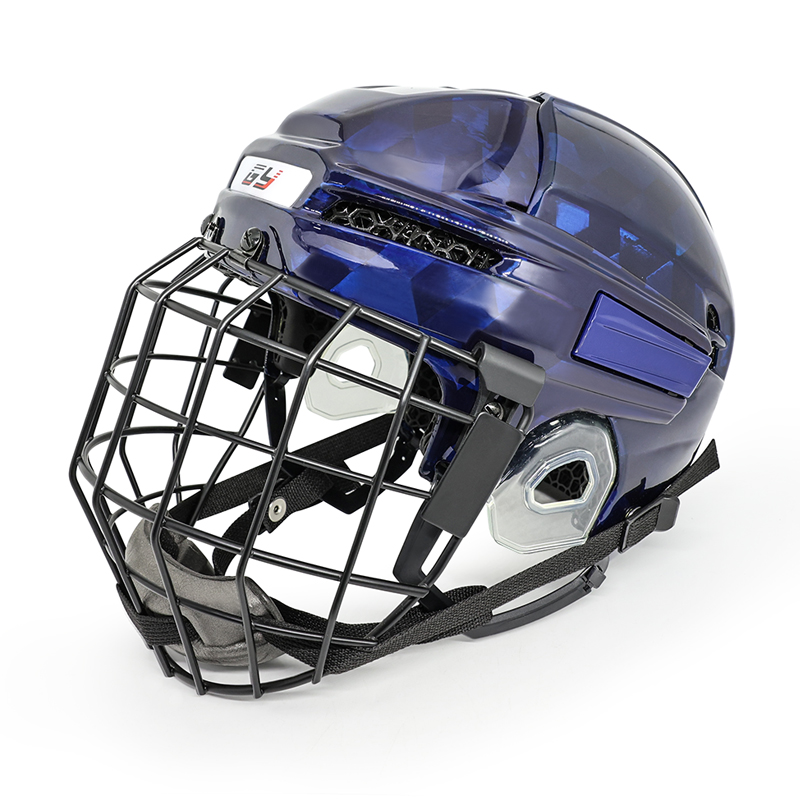
A premium liner cannot protect you if the shell geometry contradicts your bone structure. Poor fit causes dynamic shifting during play. If the shell shifts upward upon impact, it exposes your temporal and occipital lobes. This renders advanced foam technologies completely useless.
Accurate measurement prevents dangerous sizing assumptions. Sizes are not universal across brands. A medium in one brand might measure entirely differently than a medium in another.
Brands manufacture their shells using specific bias molds. Identifying your profile immediately eliminates incompatible models.
The Halo Test verifies proper lockdown. Put the gear on and secure the chin strap. Place your hands flat on the sides of the shell. Try to rotate it left and right. The helmet should not move independently of the skin on your forehead. If the shell slides across your skin, it is too loose. Next, check for localized pressure points. Any intense pressure at the temples indicates an incorrect profile, not just an incorrect size.
Your facial protection ecosystem must integrate seamlessly. Choosing the right facial protection depends on league rules, visibility preferences, and airflow needs. You must ensure the secondary hardware mounts securely.
The traditional wire mask remains the gold standard for full-face defense. It provides absolute protection against flying pucks and errant stick blades.
Many adult players prefer half-shields. They offer unobstructed peripheral vision and look professional. However, they carry significant risks. Visors leave your jaw, teeth, and lower face completely exposed. We only recommend visors for adult non-checking leagues where full facial protection is not strictly mandated.
Full clear shields combine the visibility of a visor and the full-face coverage of an ice hockey cage. They offer premium visibility on the ice. The trade-offs involve heavy maintenance. You must apply aggressive anti-fog treatments regularly. They also restrict vocal communication, making it harder to call out plays to your linemates.
Never assume a Brand X cage fits a Brand Y shell perfectly. Cross-brand mismatches often occur. You must check the J-clip alignment on the temples. Verify the chin cup placement carefully. The chin cup must rest flush against your actual chin. It should never ride up against your lip or press into your throat. If the hardware warps the plastic shell when tightened, it is fundamentally incompatible.
Regulatory standards dictate equipment compliance. Referees possess the authority to inspect gear before puck drop. Buying uncertified gear exposes you to severe physical and regulatory risks.
Valid safety stickers are a legal requirement for organized play. HECC (Hockey Equipment Certification Council) governs the United States. CSA handles Canadian standards, while CE applies to European leagues. Referees can and will ban players using uncertified or altered hardware. Look for the holographic stickers located on the lower rear quadrant of the shell.
Protective gear does not last forever. Certified models feature an exact expiration date printed on the rear sticker. Certifications expire exactly 6.5 years after the manufacturing date. After this specific window, internal foams dry out. They become brittle and fail to disperse kinetic energy efficiently. Even if the gear sat untouched in a climate-controlled closet, the chemical breakdown of the foam renders it unsafe for game use.
Never buy secondhand protective headgear. It presents a catastrophic risk. Previous impacts create micro-fractures in the polycarbonate shell. Repeated use permanently compresses internal foam cells. These structural failures remain completely invisible to the naked eye. You cannot verify the impact history of a used shell. Always purchase fresh, tightly regulated inventory to guarantee structural integrity.
You now possess the technical knowledge to evaluate materials and shapes. Follow this actionable sequence to finalize your gear selection confidently.
Evaluating an ice hockey player helmet demands a strict process of elimination. You must weed out incorrect internal shapes before looking at price tags. Eliminate insufficient foam technologies failing to match your play level. Always verify HECC/CSA expiration dates before removing the tags.
Brand names and professional endorsements do not protect your brain. Correct anatomical fit and appropriate foam density perform the actual work. Invest the necessary time to measure your circumference accurately. Execute the 10-minute wear test. Taking these deliberate steps ensures you step onto the ice with maximum confidence and uncompromising safety.
A: You must replace it every 6.5 years based on the HECC certification expiration rule. Foams degrade and harden over time, losing their ability to absorb impacts. Furthermore, you should replace it immediately following a severe crash, a diagnosed concussion, or if you notice any visible cracking in the outer shell.
A: While many models offer cross-compatibility, sticking to the same brand is the safest implementation. Mismatched hardware can physically warp the outer shell when tightened. It frequently misaligns the chin cup, causing it to ride up dangerously toward the mouth or throat during an impact.
A: A headache usually indicates you are wearing the wrong head shape profile, not just a size that is "too small." If you feel pinching specifically at the temples, the internal profile is too narrow for your skull. You need a model designed for a rounder head shape.
A: Tool-less mechanisms utilize integrated plastic latches, allowing players to make rapid width and length adjustments on the bench. Standard systems require a Philips screwdriver to loosen the side screws. Standard adjustment models are highly durable but less convenient for mid-game fixes or growing players.

