

- Home
- Products
- HOT
- Technology
- Service
- Resources
- About
- Contact
- All
- Product Name
- Product Keyword
- Product Model
- Product Summary
- Product Description
- Multi Field Search

Views: 0 Author: Site Editor Publish Time: 2026-07-31 Origin: Site


The accumulation of sweat, dead skin cells, and bacteria in hockey gear is not just an odor issue; it is a catalyst for material degradation and dermatological infections. Players and equipment managers often use improper cleaning agents that compromise the structural integrity of polycarbonate shells and protective foams, leading to premature equipment failure and reduced impact protection. Knowing how to properly sanitize an ice hockey helmet is essential for player safety and comfort on the ice.
This guide outlines an evidence-based, step-by-step protocol for sanitizing your headgear. We detail material-specific care covering everything from traditional EPP foams to advanced 3D-printed lattice structures. You will learn how to ensure maximum lifespan and hygiene without sacrificing safety. Routine maintenance prevents hardware rust, foam hardening, and severe skin irritation.
Chemical Compatibility is Critical: Harsh solvents, bleach, and ammonia degrade polycarbonate shells and internal foams; use only mild detergents or a 50/50 isopropyl alcohol and water mix.
Disassembly Ensures Thoroughness: Removing the cage, visor, and chin strap is mandatory for accessing bacterial hotspots and preventing hardware rust.
Material-Specific Protocols: Traditional closed-cell foams require different agitation and drying methods compared to the intricate structures of an adult 3D printed ice hockey helmet with cage.
Heat is the Enemy: Never use direct heat sources (radiators, hair dryers) to dry a helmet, as thermal stress warps the shell and hardens impact-absorbing liners.
A successfully maintained helmet features zero persistent odor, intact foam elasticity, rust-free hardware, and clear visor or cage visibility. Achieving this standard requires understanding the biological and chemical forces working against your equipment. Neglecting these factors directly compromises the protective capabilities of the shell and liner. When you pull a helmet out of a dark, damp hockey bag, you are handling a prime breeding ground for harmful pathogens.
Staphylococcus aureus and other bacteria thrive in the closed environment of a hockey bag. These microorganisms multiply rapidly in sweat-soaked foams. This biological threat leads to folliculitis, forehead acne, and severe odors. The problem is especially prevalent in high-sweat environments like youth hockey leagues and intensive training camps. Bacteria break down organic matter, releasing the foul-smelling gases commonly associated with neglected sports gear. If you ignore this, the bacteria will eventually colonize the deeper layers of the foam.
Dried sweat presents a severe chemical threat to equipment longevity. Sweat contains high levels of salt and acidic compounds. As moisture evaporates, these corrosive elements remain embedded in the foam and hardware. The acidic content breaks down the industrial adhesives holding foam liners in place. Simultaneously, salt accelerates the oxidation of metal screws, J-clips, and cage wire. Rusted hardware can fail during a high-speed impact, rendering the facial protection useless.
Threat Type | Source | Impact on Equipment | Impact on Player |
|---|---|---|---|
Biological | Bacteria (Staph), Fungi | Deep foam colonization, persistent foul odor | Folliculitis, acne, skin infections |
Chemical | Sweat (Salt & Acid) | Adhesive failure, foam breakdown | Reduced impact absorption |
Oxidative | Moisture & Salt | Rusted screws, weakened cage wire | Hardware failure during collisions |
Equipment managers in professional locker rooms do not wait for gear to smell before acting. They implement preventative maintenance schedules. You must adopt this same mindset. Treating the gear after it becomes a biological hazard requires harsh chemicals that often damage the materials. Preventative cleaning extends the life of the gear and ensures the safety certifications remain valid.
Breaking down the helmet into its component parts isolates cleaning methods and prevents cross-contamination. You cannot effectively clean the deep crevices of the shell while the facial protection remains attached. Proper disassembly exposes hidden bacterial hotspots and allows for a comprehensive hardware audit. Attempting to wash a fully assembled unit pushes dirt and bacteria deeper into the mounting points.
Begin by setting up a clean, well-lit workspace. You will need a properly sized Phillips-head screwdriver, a magnetic parts tray, and a few microfiber cloths. Rushing the disassembly process often leads to stripped screws or lost hardware. Follow a systematic approach to ensure every component is accounted for and inspected.
Detach the cage or visor by removing the mounting screws at the temples and forehead.
Place all screws, washers, and J-clips directly into the magnetic tray to prevent loss.
Carefully slide the facial protection away from the shell and set it aside on a soft towel.
Unsnap and remove the chin strap, setting it aside for heavy-duty laundering.
Isolate all removable comfort pads and fabric sweatbands held by Velcro.
Perform a strict hardware audit while the components are separated. Inspect every screw and snap for stripping, cross-threading, and rust. Oxidized hardware loses its tensile strength and snaps under pressure. Replace any rusted screws immediately to ensure the cage remains securely fastened under impact. A clean helmet is useless if the facemask detaches during a collision.
Component | Inspection Focus | Action if Damaged |
|---|---|---|
Mounting Screws | Rust, stripped threads, bent shafts | Replace immediately with certified hardware |
J-Clips | Cracks in plastic, loose fit | Replace to ensure cage stability |
Chin Strap | Frayed nylon, rusted snaps, broken buckles | Replace strap assembly |
Velcro Pads | Loss of adhesion, torn fabric | Wash separately; replace if adhesion fails |
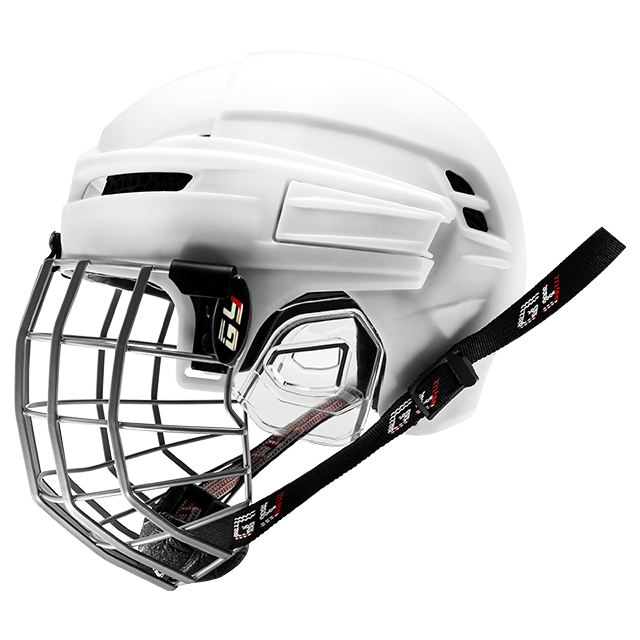
Matching your cleaning technique to the specific internal architecture of the headgear is non-negotiable. Different impact-absorbing materials require distinct handling to prevent structural damage. Applying the wrong method can tear foam blocks or warp intricate lattice structures. You must identify the type of liner inside your gear before applying any water or detergent.
Traditional Vinyl Nitrile (VN) and Expanded Polypropylene (EPP) foams are common in many models. These closed-cell foams absorb impact but also trap surface dirt. Use a soft, non-abrasive sponge with a pH-neutral, mild baby shampoo or specialized sports detergent. Avoid dish soaps containing heavy degreasers, as these strip essential oils from the foam, causing it to dry out and crack.
Gently wipe down the internal channels and flat foam surfaces. Apply light pressure to avoid snagging or tearing the foam blocks away from the shell. Pay special attention to the forehead and temple areas where sweat pools heavily. Rinse the sponge frequently in clean water to avoid spreading dirt across the liner. Once wiped down, use a clean, damp cloth to remove any residual soap.
Modern equipment requires updated maintenance routines. An Adult 3D Printed Ice Hockey Helmet with Cage presents unique cleaning challenges. The intricate 3D-printed lattice structures trap hair, dirt, and organic debris deep within the geometric matrix. Standard wiping techniques cannot reach these internal voids, and attempting to scrub them will cause severe damage.
Remove all electronic or non-waterproof attachments (if any).
Hold the shell upside down under a standard showerhead or utility sink faucet.
Use a high-volume, low-pressure stream of lukewarm water to flush the lattice matrix.
Allow the water to push contaminants out through the ventilation holes.
Strictly avoid using stiff-bristled brushes or scrubbing pads on the resin filaments.
Facial protection requires specific care to maintain visibility and structural integrity. For metal cages, wipe down the wire with a mild disinfectant. Check all weld points for chipped paint or rust spots. Exposed metal rusts quickly and compromises the cage's ability to deflect pucks. If you find deep rust at a weld joint, the cage must be replaced.
Visors and shields demand extreme care. Utilize a dedicated anti-scratch, anti-fog safe cleaner with a clean microfiber cloth. Strictly avoid paper towels, which leave micro-scratches on the polycarbonate surface. Never use ammonia-based glass cleaners. Ammonia instantly strips the factory anti-fog coatings and causes the plastic to become brittle and cloudy over time.
The high-density plastic exterior takes a beating from pucks, sticks, and boards. Wipe the outer shell with a damp microfiber cloth and mild detergent. To remove stubborn puck marks and old tape residue, use specialized, non-solvent adhesive removers. Avoid using acetone or paint thinners, as these chemicals melt the polycarbonate shell and void all safety certifications.
Killing bacteria is the only way to eliminate persistent odors. However, you must prevent the use of toxic chemicals that cause skin irritation or compromise safety certifications. Selecting the right disinfecting agent protects both the player and the equipment. Masking odors with heavy fragrances does nothing to stop the biological degradation of the foams.
The isopropyl alcohol method is highly effective and safe for most materials. Formulate a 50/50 mix of water and 70% rubbing alcohol in a fine-mist spray bottle. Lightly mist the internal foams and plastic shell. The alcohol kills surface bacteria on contact and evaporates quickly without degrading industrial glues. Do not soak the foams; a light, even mist is sufficient to sanitize the surface.
Commercial sports sprays offer another viable solution. Evaluate the efficacy of hypochlorous acid (HOCl) sprays and enzymatic cleaners specifically formulated for hockey gear. Enzymatic cleaners break down the organic proteins in sweat, neutralizing odors at the source. These are highly recommended for gear that has been neglected for long periods.
Disinfectant Type | Pros | Cons | Best Use Case |
|---|---|---|---|
50/50 Isopropyl Alcohol | Evaporates quickly, cheap, highly effective | Can dry out foams if overused | Routine post-game spray downs |
Enzymatic Cleaners | Destroys organic matter at the source | Requires longer drying time | Deep cleaning neglected, foul-smelling gear |
Hypochlorous Acid (HOCl) | Skin-safe, non-toxic, kills bacteria rapidly | More expensive than alcohol | Youth gear and players with sensitive skin |
Strictly avoid bleach, aerosol disinfectants with heavy propellants, and strong household degreasers. Bleach destroys foam elasticity and corrodes metal hardware instantly. Aerosol propellants often contain harsh solvents that melt polycarbonate and dissolve foam adhesives. Using these chemicals will ruin your gear and potentially cause severe chemical burns on your forehead.
Skin-safe considerations are vital, especially for youth players. Select hypoallergenic, non-irritating, and fragrance-free sanitizers. Harsh chemicals trapped in the forehead foam will mix with sweat during the next game, causing severe contact dermatitis. Always prioritize non-toxic solutions when dealing with equipment that sits directly against the skin for hours.
Establishing a sustainable post-game habit prevents the need for constant deep cleans. Bacteria require moisture to multiply. Removing that moisture rapidly is your best defense against odor and material degradation. Leaving wet gear in a zipped bag creates a perfect incubator for mold colonization.
Airflow optimization is non-negotiable. You must remove the headgear from the hockey bag immediately after ice time. Open the shell to its widest setting to maximize airflow through the internal channels. Place the equipment in a well-ventilated room. Stagnant air allows moisture to linger deep within the foam blocks.
Remove the gear from the bag immediately upon returning home.
Wipe down the interior with a dry microfiber cloth to remove bulk moisture.
Apply a light mist of your chosen safe disinfectant.
Place the gear on a wire rack or specialized gear tree.
Position a standard oscillating fan to blow ambient air across the equipment.
Avoid the thermal risk known as the "radiator trap." Never place the equipment directly on or close to a radiator, heating vent, or use a hot hair dryer. Direct heat causes irreversible thermal degradation. It hardens impact foams, melts adhesives, and warps the polycarbonate shell, completely destroying the protective value of the gear. Ambient air drying is the only safe method.
Assess whether the equipment is worth the labor of a deep clean or if it has reached the end of its functional lifespan. No amount of cleaning can restore degraded impact protection. Knowing when to replace gear is a critical safety skill. Equipment managers constantly evaluate gear to ensure players are protected from concussions and skull fractures.
Identify foam hardening by pressing firmly into the VN or EPP liners. Healthy foam compresses slightly and rebounds immediately. If the foam feels brittle, shows visible shrinkage away from the shell, or feels like solid rock, it can no longer absorb impact energy. Hardened foam transfers collision force directly to the skull. If you find hardened foam, throw the gear away.
Always check the certification expirations. Locate the HECC (Hockey Equipment Certification Council) or CSA stickers on the back of the shell. These stickers display a specific expiration date, usually 6.5 years from the date of manufacture. No amount of cleaning restores the safety rating of an expired shell. Referees will remove players wearing expired gear from the ice.
Consider upgrade options if your current gear constantly retains moisture and odor. Transitioning from older, dense foam models to a modern, highly ventilated design mitigates future moisture retention issues. Advanced lattice liners offer superior airflow, drying much faster than traditional closed-cell foams. Upgrading improves both hygiene and impact protection.
Consistent, mild cleaning and immediate ambient drying are the only proven methods to maintain hygiene and structural integrity. If severe odor persists after a deep clean, or if the foams feel rigid and unyielding, the materials have degraded beyond repair and require immediate replacement. Do not risk your safety to save a few dollars on expired or degraded gear.
Implement a strict post-game spray-and-dry routine using a 50/50 isopropyl alcohol mix immediately after every ice session.
Schedule a complete disassembly and deep clean at the midpoint and end of the hockey season to inspect hardware and remove deep contaminants.
Replace any rusted screws, J-clips, or hardened foam liners immediately to maintain impact safety standards.
Check your HECC or CSA certification stickers today and discard any gear that has passed its expiration date.
A: No. The high heat of a dishwasher will warp the polycarbonate shell, melt the adhesives holding the liner in place, and permanently harden the impact-absorbing foams. Dishwasher detergents also contain harsh chemicals that degrade the plastic. Always wash by hand using mild soap and lukewarm water.
A: A 50/50 mixture of water and 70% isopropyl alcohol is highly effective and safe. Alternatively, use commercial sports sprays containing hypochlorous acid (HOCl) or enzymatic cleaners designed specifically for athletic gear. Avoid bleach and heavy aerosol disinfectants.
A: The sour smell is caused by bacteria feeding on dried sweat. Disassemble the gear, wash the liner with mild baby shampoo, and rinse thoroughly. Once dry, spray the interior with an enzymatic cleaner or a 50/50 water and rubbing alcohol mix to kill the remaining bacteria.
A: Yes, when diluted. A 50/50 mix of water and 70% isopropyl alcohol applied as a fine mist is safe for polycarbonate shells and most foams. It kills bacteria and evaporates quickly. Do not soak the foams in alcohol, as excessive exposure can dry out the materials.
A: You should perform a deep clean—involving full disassembly and washing—at least twice a season (midpoint and end). However, you must implement a light spray-and-dry routine after every single practice or game to prevent bacterial buildup.
A: Remove the cage and flush the 3D-printed lattice structure with a high-volume, low-pressure stream of lukewarm water, such as from a showerhead. This pushes trapped dirt out of the matrix. Never use stiff brushes, as they can tear the delicate resin filaments.
A: An ammonia smell occurs when bacteria break down the proteins and urea present in your sweat. This indicates a severe bacterial colonization deep within the foam cells. A thorough deep clean with an enzymatic cleaner is required to break down these organic compounds.


