

- Home
- Products
- HOT
- Technology
- Service
- Resources
- About
- Contact
- All
- Product Name
- Product Keyword
- Product Model
- Product Summary
- Product Description
- Multi Field Search

Views: 0 Author: Site Editor Publish Time: 2026-09-07 Origin: Site


Securing a precisely fitted helmet is the single most critical step in mitigating traumatic brain injuries and concussions on the ice. Standardizing head sizes based on generic age or weight charts is fundamentally flawed. Players frequently purchase incorrect sizes because they rely on these broad estimates rather than exact biometric measurements and specific head shape profiles. A helmet that measures correctly on paper but fails to match the wearer's physical head topography offers compromised protection.
Understanding how to measure for a helmet requires a standardized, evidence-based methodology. By capturing precise head dimensions, evaluating brand-specific fit profiles, and selecting the appropriate interior technology, players can ensure maximum protective efficacy and safety compliance. This guide outlines the exact steps to measure, fit, and validate your next helmet.
Measurement Precision is Non-Negotiable: Accurate circumference measurement using a flexible tape is the foundational metric for helmet selection, superseding age or weight-based estimates.
Head Shape Dictates Brand Selection: A helmet must match the player’s specific head topography (round vs. oval); an incorrect shape profile renders correct circumference measurements useless.
Advanced Fit Technologies are Redefining Protection: Innovations like the adjustable 3D printed ice hockey helmet offer bespoke fit solutions that bridge the gap between standard retail sizing and custom head mapping.
Validation is Required Pre-Play: Passing the physical "shake test", checking chin strap and occipital lock alignment, and verifying current HECC/CSA certifications are mandatory final steps before finalizing a helmet investment.
A perfect fit is defined by specific physical criteria: zero negative space between the liner and the scalp, an absence of localized pressure points, and a secure occipital lock at the base of the skull. When these criteria are met, the helmet functions exactly as engineered. If any of these elements are compromised, the protective capabilities degrade rapidly.
Helmets are engineered to distribute kinetic energy across the surface area of the interior liner. When a player sustains a linear or rotational impact, the shell diffuses the initial force, while the interior padding compresses to decelerate the head. Negative space—caused by a loose fit—allows the head to accelerate independently of the helmet before striking the interior foam, amplifying the impact force. Conversely, an overly tight fit pre-compresses the padding, severely limiting its ability to absorb energy during a collision. Both scenarios compromise the liner’s ability to manage impacts effectively.
Fit Condition | Impact Mechanics | Protective Consequence |
|---|---|---|
Optimal Fit (Zero Negative Space) | Foam compresses evenly upon impact; shell disperses force across maximum surface area. | Maximum intended deceleration of the skull; highest level of protection. |
Loose Fit (Excess Negative Space) | Skull accelerates inside the shell before hitting the foam; helmet shifts out of position. | Amplified impact force; high risk of secondary impacts and facial exposure. |
Overly Tight Fit (Pre-compressed Foam) | Foam is already partially compressed by the head; limited remaining travel distance for impact absorption. | Bottoming out of the foam; direct transfer of kinetic energy to the skull. |
Bypassing proper measurement protocols introduces significant physical and financial risks. Physically, an ill-fitting helmet drastically increases the probability of concussions and facial lacerations. Financially, wearing a helmet improperly can void manufacturer warranties. Helmets that cause severe pressure points are often discarded prematurely, forcing players to purchase replacements long before the shell or foams have reached the end of their usable lifespan.
Accurate measurement requires the right tools and a consistent technique. Do not rely on string or rigid metal tape measures if possible; a flexible tailor’s measuring tape provides the most accurate contour reading.
Before taking any measurements, consider hair volume. Measure the head with the exact hairstyle typically worn during gameplay. If the player wears ponytails, braids, thick sweatbands, or skull caps on the ice, these must be worn during the measurement process to ensure the helmet accommodates the extra volume. Failing to account for game-day hair is a common mistake that leads to purchasing a helmet one size too small.
Positioning: Place the flexible tape approximately 1/2 inch to 1 inch (1.5 to 2.5 cm) above the eyebrows. Keep the tape completely level around the circumference of the head.
Routing: Wrap the tape around the head, ensuring it crosses the most prominent part of the back of the head, known as the occipital bone. This is the widest part of the skull.
Recording: Document the final measurement in both inches and centimeters. Global manufacturers utilize different primary metrics on their sizing charts, so having both numbers prevents conversion errors.
Circumference is only half the equation. The two primary head shapes in hockey are Oval (narrower side-to-side, longer front-to-back) and Round (wider side-to-side, shorter front-to-back). Visually assess the head shape from a top-down perspective. An oval head in a round helmet will suffer from lateral negative space, while a round head in an oval helmet will experience severe pressure points at the temples. Identifying this shape informs which brands and models will physically accommodate the player.
Manufacturers divide helmets into Youth, Junior, Intermediate, and Senior size categories. These categories dictate the overall shell dimensions and facial protection compatibility. Ensure you are shopping within the correct category to prevent cross-shopping incompatible shell dimensions that cannot be properly adjusted to the player's frame. A senior small and a junior large might share similar circumference measurements, but the shell depth and jaw alignment will differ significantly.
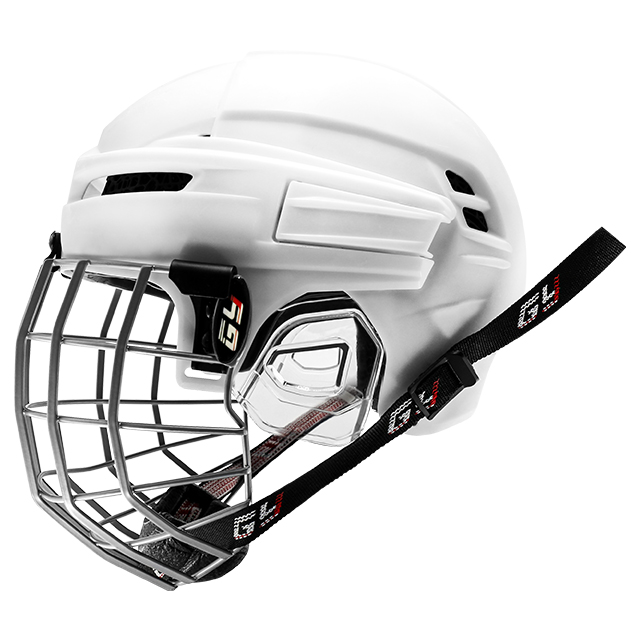
Once you have your measurements, you must translate them into a specific size using the manufacturer's proprietary charts. Never assume a medium in one brand equates to a medium in another.
Map your recorded centimeter or inch measurement against the specific sizing chart for the brand you are considering. If your measurement falls exactly between two sizes—often referred to as the overlap zone—the general rule of thumb is to size down. Interior padding naturally compresses and packs out over time. A smaller helmet that starts slightly snug will break in to form a perfect fit, whereas a larger helmet will only become looser and more dangerous with use.
Helmet Size | Typical Circumference (cm) | Typical Circumference (inches) | Hat Size Equivalent |
|---|---|---|---|
Small | 52 - 57 cm | 20.4 - 22.4 in | 6 1/2 - 7 1/8 |
Medium | 55 - 60 cm | 21.6 - 23.6 in | 6 7/8 - 7 1/2 |
Large | 58 - 63 cm | 22.8 - 24.8 in | 7 1/4 - 7 7/8 |
Historically, major manufacturers have favored specific fit tendencies. Some brands are notorious for catering to oval heads, while others build wider shells for rounder profiles. However, modern product lines within the same brand now often offer varying fit profiles across different models. It is necessary to evaluate the specific model's fit profile rather than relying solely on brand reputation. Finding the right ice hockey helmet requires matching your head shape to the specific shell design of the model in question.
The market offers a spectrum of fit adjustability, rotational impact protection systems, and interior liner technologies. Understanding these differences helps align the helmet's capabilities with the player's specific needs.
Standard two-piece adjustable shells typically utilize VN (Vinyl Nitrile) or EPP (Expanded Polypropylene) foams. VN offers a softer, more traditional feel that molds slightly to the head, while EPP is a stiffer, lighter foam designed for high-impact absorption. These helmets use either tool-free clips or traditional screw mechanisms for adjustment. It is important to note that these mechanisms primarily adjust the length (front-to-back) of the helmet but fail to alter the width, making head shape compatibility even more critical.
Recent innovations have introduced dynamic fit solutions that conform to micro-variations in head shape. The Adjustable 3D Printed Ice Hockey Helmet utilizes complex lattice structures that replace traditional closed-cell foams. These 3D printed liners offer omnidirectional conformity, meaning they adapt to both the length and width of the head simultaneously. This technology provides continuous fit adjustment, superior breathability, and highly efficient energy dispersion compared to standard foam blocks.
Feature | Traditional VN/EPP Foam | 3D Printed Lattice Liner |
|---|---|---|
Fit Conformity | Static; relies on shell adjustment for length only. | Dynamic; omnidirectional conformity to micro-variations. |
Breathability | Low to moderate; closed-cell foams trap heat. | High; open lattice structure allows maximum airflow. |
Impact Dispersion | Linear compression. | Multi-directional energy absorption and rotational mitigation. |
When evaluating options, weigh the upfront cost of premium 3D printed or custom-fit helmets against their long-term benefits. Advanced liners often provide enhanced rotational impact protection, superior daily comfort, and better moisture management. While traditional foams are highly effective, the bespoke fit of modern lattice structures significantly reduces the risk of negative space, thereby maximizing the helmet's protective ceiling.
The primary implementation risk is purchasing a helmet that measures correctly on a sizing chart but fails in practical application due to individual anatomical variances. Physical validation is mandatory before the helmet sees ice time.
The Shake Test: With the helmet placed on the head but left unbuckled, the player should shake their head vigorously up and down, and left and right. The helmet must not shift independently of the scalp. The skin on the forehead should move with the helmet padding.
The Eyebrow Test: The front rim of the helmet should rest exactly one finger-width (approximately 1/2 inch) above the eyebrows. This positioning protects the frontal lobe and forehead without obstructing the player's upward field of vision.
Pressure Point Identification: Wear the fully adjusted helmet for 10 to 15 minutes in a room-temperature environment. Identify any localized throbbing, headaches, or red marks upon removal. Pressure at the temples or forehead indicates a fundamental shape mismatch that adjusting the length will not fix.
Ensure the rear stabilization system is dialed in. The occipital lock must cup tightly beneath the occipital bone at the base of the skull to prevent the helmet from rolling forward during a collision. Next, adjust the chin strap. The strap should be tight enough that no more than two fingers can fit flat between the strap and the throat. A loose chin strap allows the helmet to eject during secondary impacts.
The chosen helmet size must accurately align with visors, cages, or full face shields without warping the plastic shell. Ensure that J-clips and chin cups align perfectly with the player's jaw. A chin cup that floats above the chin or presses too tightly against the throat indicates an incompatibility between the helmet size and the cage size, which compromises shock absorption during facial impacts.
Confirm the presence and validity of safety certifications. Look for valid HECC (USA), CSA (Canada), and CE (Europe) stickers on the rear of the shell. These stickers display an expiration date. An expired helmet, regardless of how perfectly it fits, is a severe liability and is illegal for use in sanctioned league play due to the natural degradation of the protective foams over time.
Measure your head circumference immediately using a flexible tailor's tape, accounting for your game-day hairstyle.
Identify your specific head shape (oval vs. round) to filter out incompatible helmet models before looking at sizing charts.
Consult the manufacturer sizing charts and select a model that aligns with your measurements, opting to size down if you fall in the overlap zone.
Perform the 15-minute pressure test, the shake test, and the eyebrow test at home to validate the fit before removing any tags.
Verify that the HECC/CSA certification stickers are present and have not expired before stepping onto the ice.
A: Recommend sizing down to the smaller size, as helmet padding will naturally compress and pack out over time, whereas a helmet that is too large cannot be made safely smaller.
A: It should be comfortably snug with zero negative space. It should grip the head enough that the skin on the forehead moves with the helmet, but not so tight that it causes headaches or pressure points.
A: Most traditional two-piece helmets only adjust for length (front-to-back). If a helmet is too tight on the sides, you likely need a different model designed for a rounder head shape, or an advanced adjustable 3D printed ice hockey helmet that offers omnidirectional conformity.
A: Use the exact same flexible tape method as adults. Never buy a helmet for a child to "grow into"; a loose helmet on a youth player is a severe safety hazard.
A: Yes. Always measure your head with the exact hairstyle and thickness you intend to wear during games, including any skull caps or sweatbands.
A: Regardless of fit, helmets must be replaced when their HECC/CSA certification expires (typically 6.5 years from manufacturing), or immediately if the shell is cracked or the foam is visibly degraded or rock hard.


